Appliances
Home Keeper supports appliances for maintenance tasks and warranty records on things that are not Home Assistant devices, such as a fridge, furnace, or water heater. This is useful for tasks and warranty data on a thing that has no device of its own. Manage appliances on the Appliances tab in the panel. Add a new appliance, or select an existing device.
- New appliance: Home Keeper registers a virtual device for it. Multiple tasks share one device page, and other integrations can attach to it too.
- Existing device: select a device that another integration provides and add the same metadata to it. Home Keeper does not own the device. The manufacturer and model and serial number are prefilled from the device registry when present.
An appliance has structured fields that Home Assistant reads: manufacturer and model
and serial number and an mdi icon and replacement cost. The Notes field renders
as Markdown. Custom fields are a label with a value of type
text or link or date. Common fields such as serial number and warranty
expiry are seeded. Enable track on a date field to create a date sensor on
the device page for use in automations. An untracked date is display-only.
The appliance detail page has the metadata and parts and related tasks and subdevices and the full maintenance history. The history keeps the completions of tasks that were deleted while assigned to the appliance.
Settings → Import and export holds the appliance report, a CSV file with make and model and replacement cost and the value of spares on hand and a total. A Details column lists each appliance's custom fields. Use it for an insurance claim.
Archiving appliances
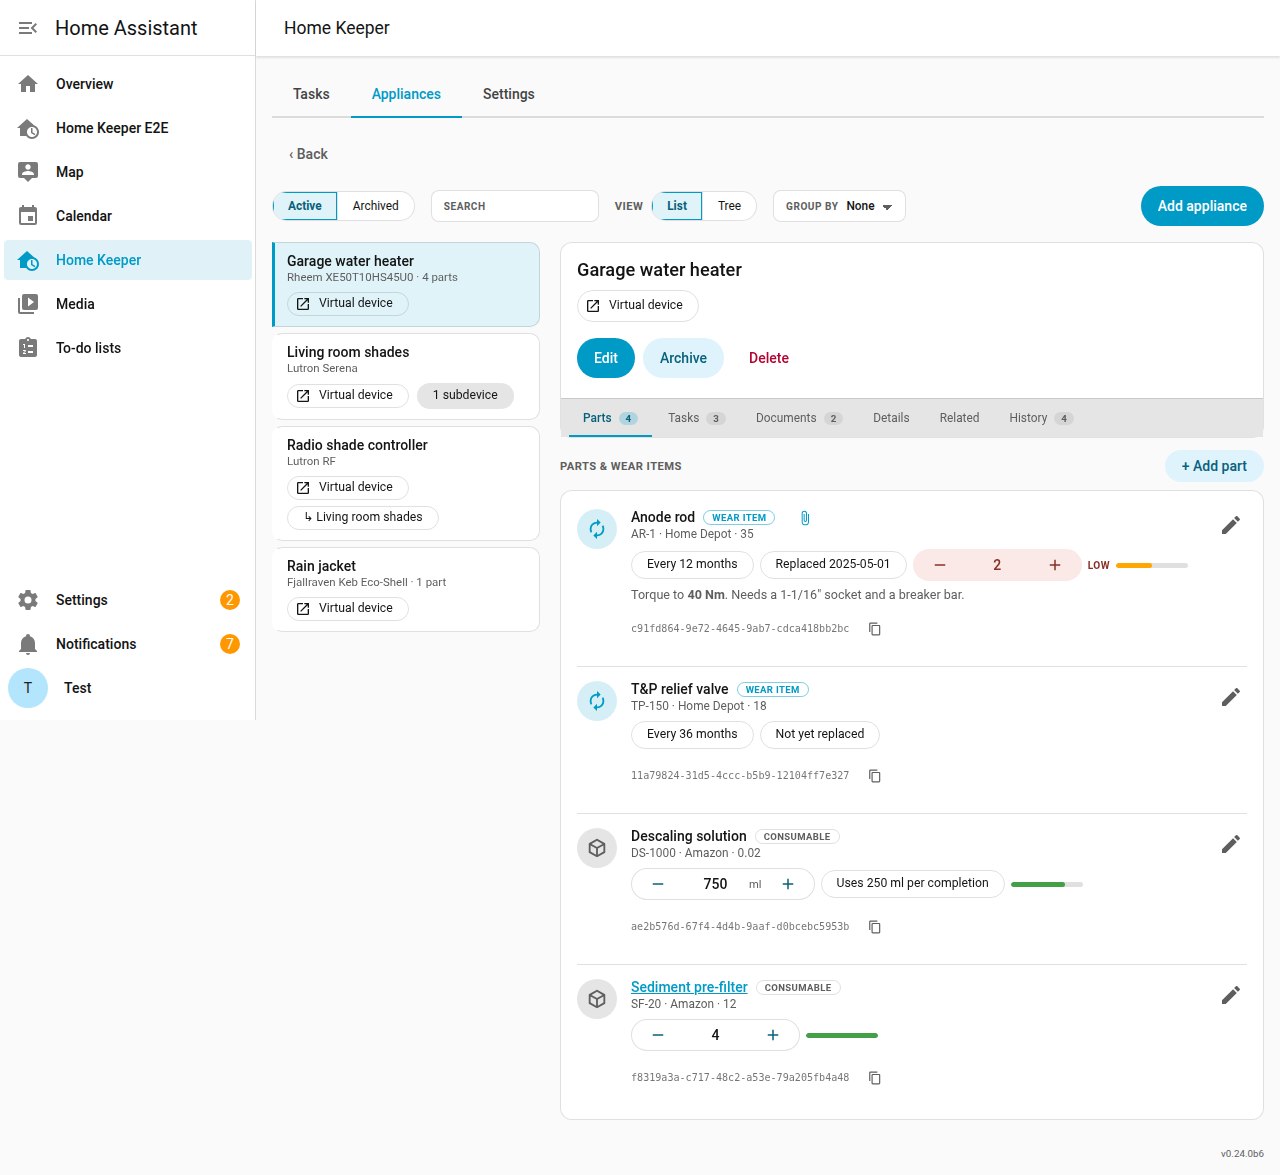
Archive an appliance to remove it from the active list and keep its history. The documents and parts and metadata and maintenance history are kept. The device page and the entities continue to work. Use the Active / Archived toggle on the Appliances tab to show archived appliances. An archived appliance can be restored at any time or deleted from its detail page.
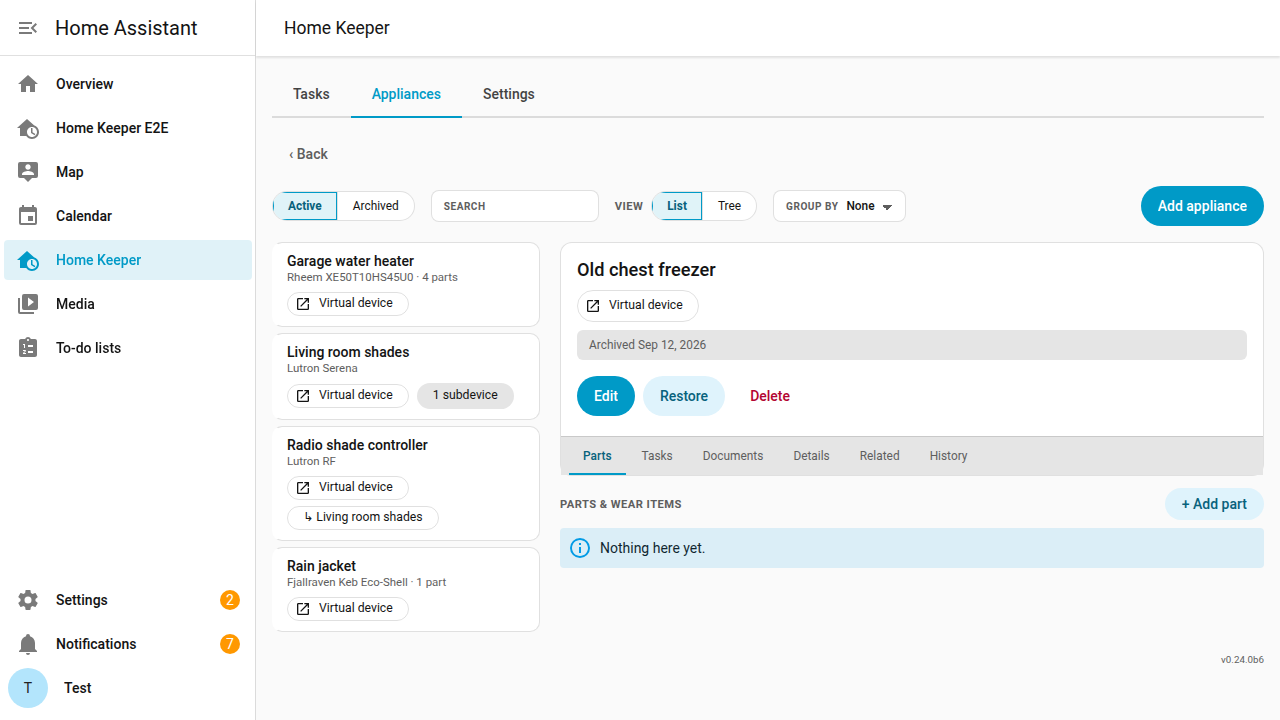
Delete asks for confirmation for an appliance and for a task.
Tree view
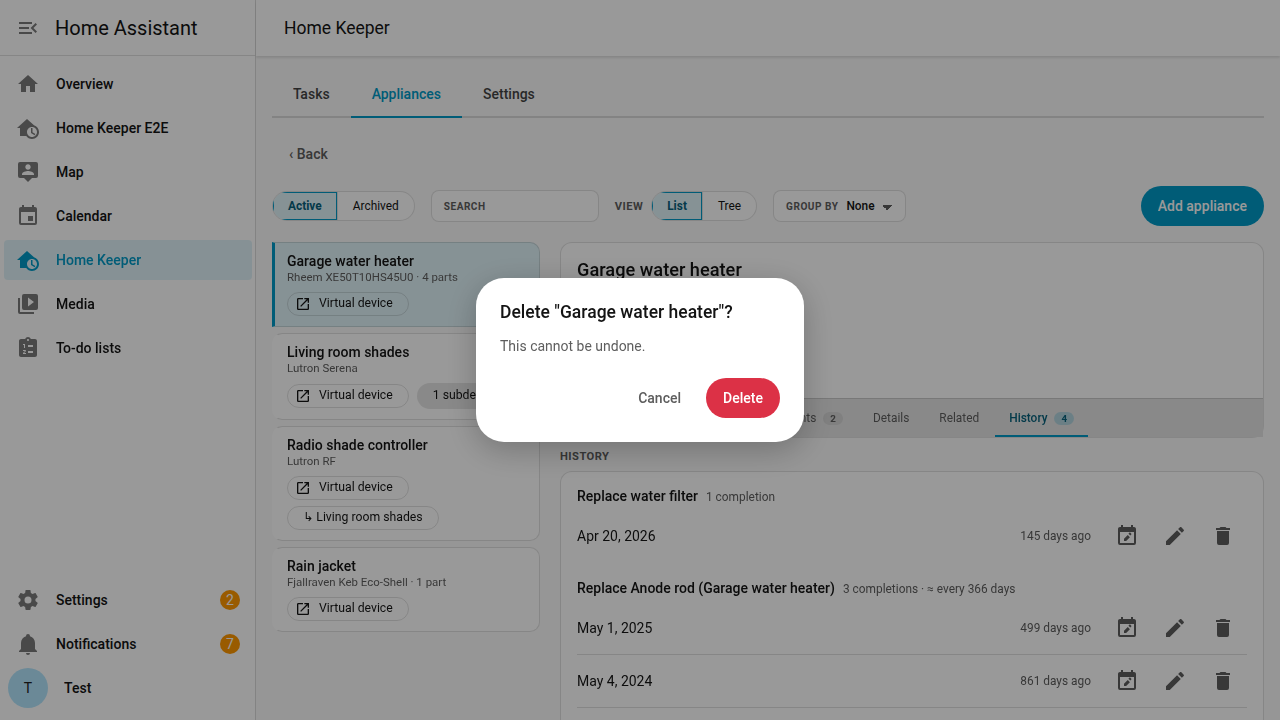
Home Keeper supports parent and child relationships between appliances. A child is a subdevice of its parent. Use the View toggle on the Appliances tab to show the appliances as a tree with children under their parents.
Parts & wear items
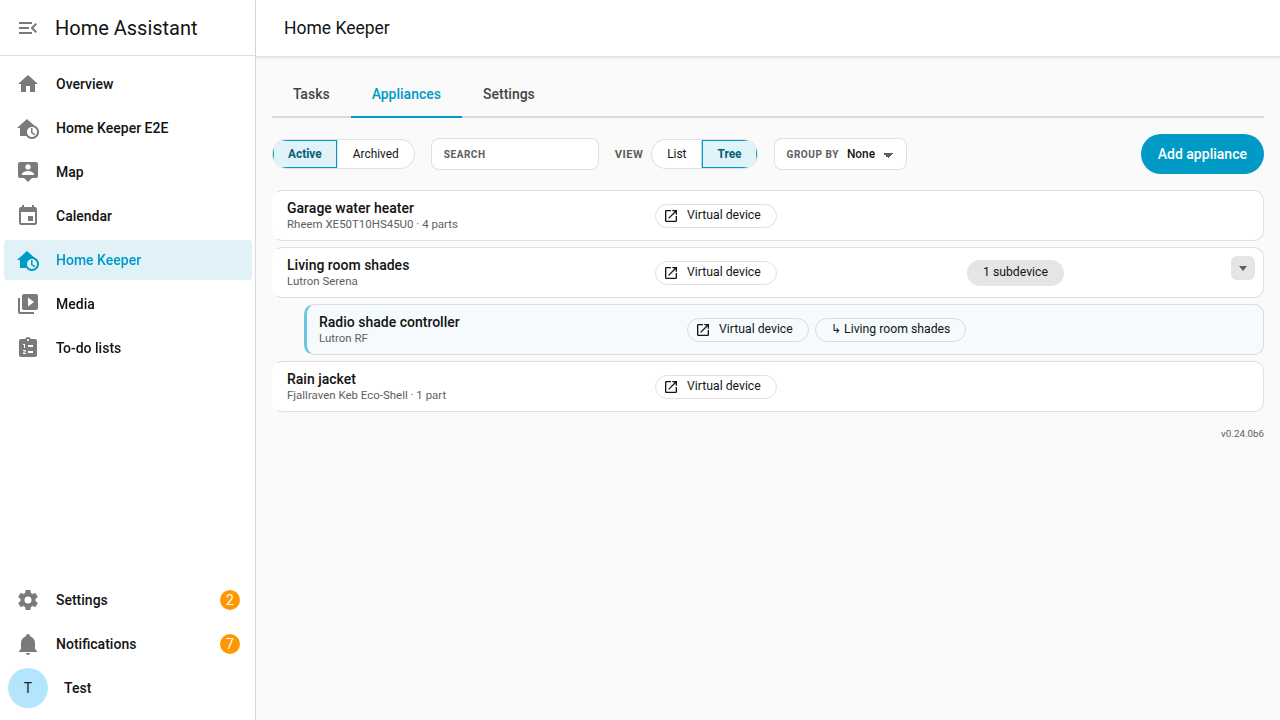
Each appliance has a parts list. A part has a name and part number and vendor and cost and notes in Markdown. Each part is a consumable or a wear item. Set a replacement interval on a wear item and Home Keeper creates a maintenance task for it on the appliance's device. The task appears in the to-do list and the calendar with a mark-done button and a next-due sensor. A completion sets the part's last replaced date. The last replaced date can be set to a past date so that the schedule starts from the real date.
The appliance edit drawer shows the parts list as collapsible rows. A collapsed row shows the part's name and a one-line summary. Only 1 row is open at a time, and a new part opens by itself.
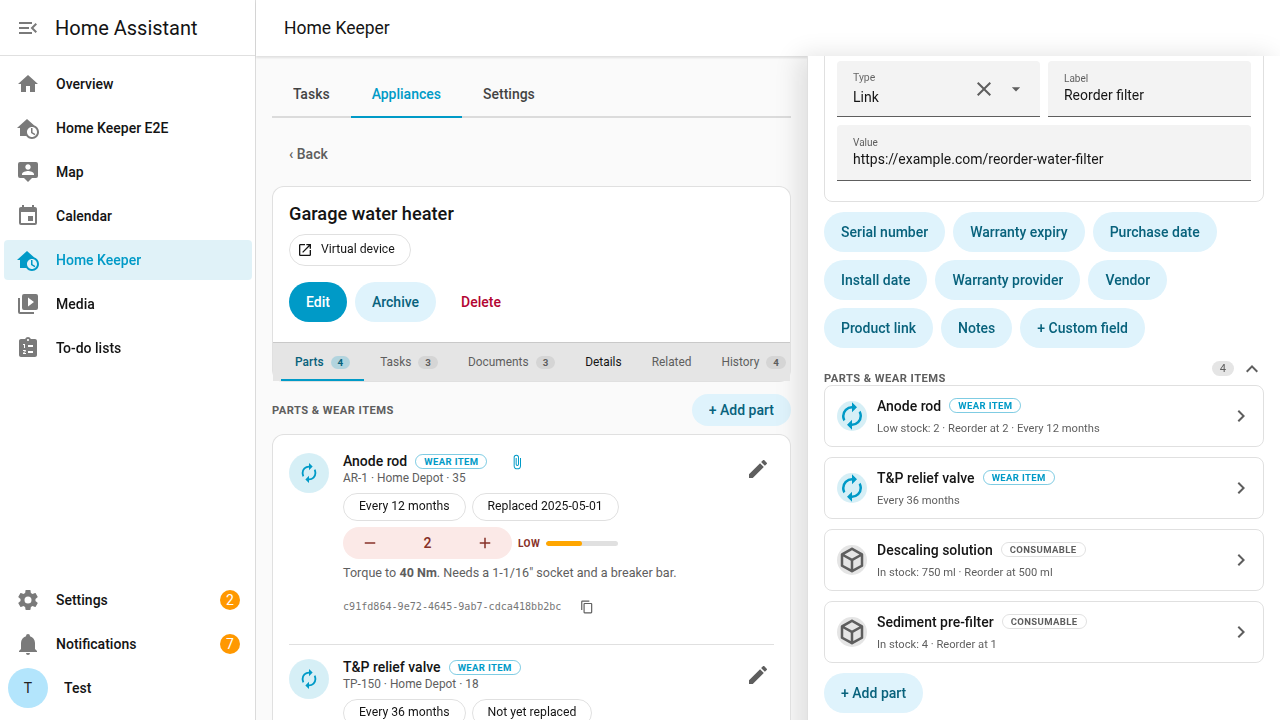
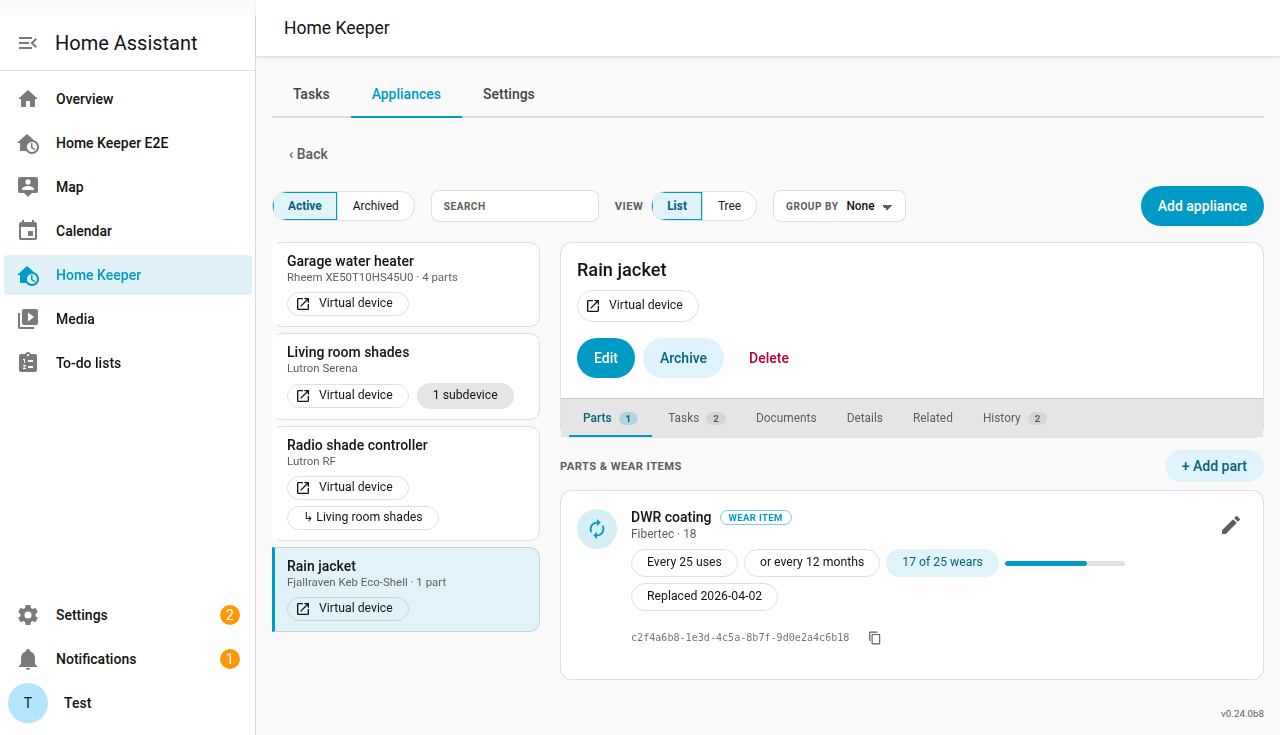
The appliance page's Parts tab has an Edit icon on each part row and an Add part button. Both open the part in the edit drawer, expanded and scrolled into view.
A part can have a product URL. The part's name on the appliance detail page then opens the product page in a new tab. A task that is linked to the part shows the same link on its detail page and on the dashboard card.
Each part can have 1 attached file, such as a receipt or a photo. Upload it from the part editor. Open or remove it from the same card.
A part can track spare inventory with a stock count and a reorder-at
threshold. A wear-item replacement draws down the part's per-use amount. The default
is 1 spare. When the stock drops to or below
the threshold Home Keeper fires a home_keeper_part_low_stock event for use in an
automation. Any task can be
linked to a consumable part and a
completion of that task then draws down the same stock. Stock deduction applies to
every completion path. This includes manual completion and tag scans and
auto-clearing sensor tasks.
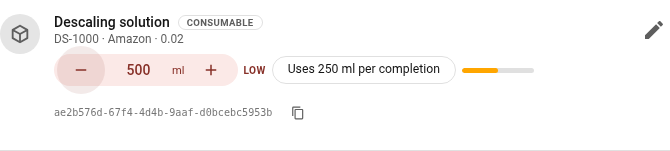
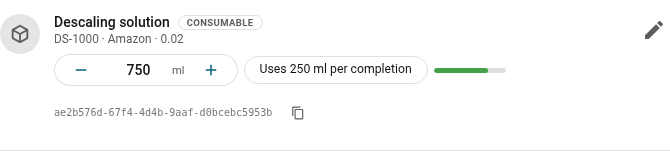
On the appliance page's Parts tab, the In stock chip is a stepper. Press
− or + to move the stock by 1 spare. For a part measured in a unit, 1 press
moves 1 completion's amount. To save a typed value, press Enter or move focus
away. Each change uses the same home_keeper.adjust_part_stock service path as a
completion, so low-stock events and auto-created buy tasks still fire.
Stock you measure rather than count
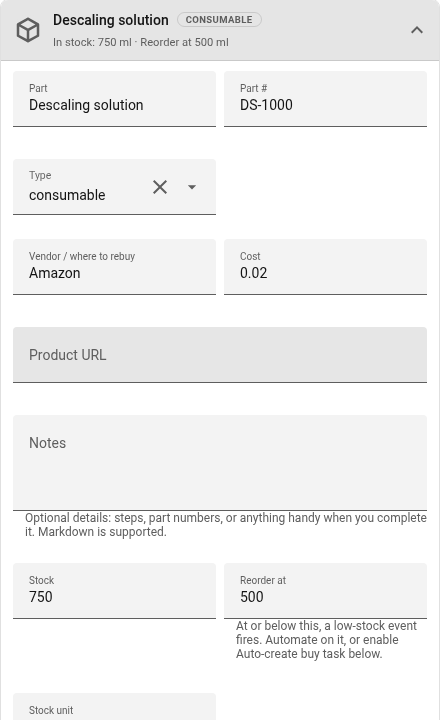
Home Keeper supports stock that is measured in a unit instead of counted. This is useful for a liquid in a bottle or a line on a spool. 2 optional fields on a stock-tracked part set this up.
- Stock unit sets the unit of the stock numbers, such as
mlorbottles. The unit is shown with the stock and in theunitfield of the stock events. An empty unit means whole spares. - Used per completion sets how much 1 completion draws down. An empty value
means 1 whole spare. A value of
0.33means that 3 completions use 1 bottle.
The stock fields and the delta field of home_keeper.adjust_part_stock accept
decimals. A part with no unit and no per-use amount accepts whole spares only.
Count uses instead of months
Some things wear out with use and not with time. A rain jacket needs a new water repellent coating after so many wears. Boots need a re-wax after so many hikes. A blade needs a sharpen after so many cuts. No sensor reports these numbers.
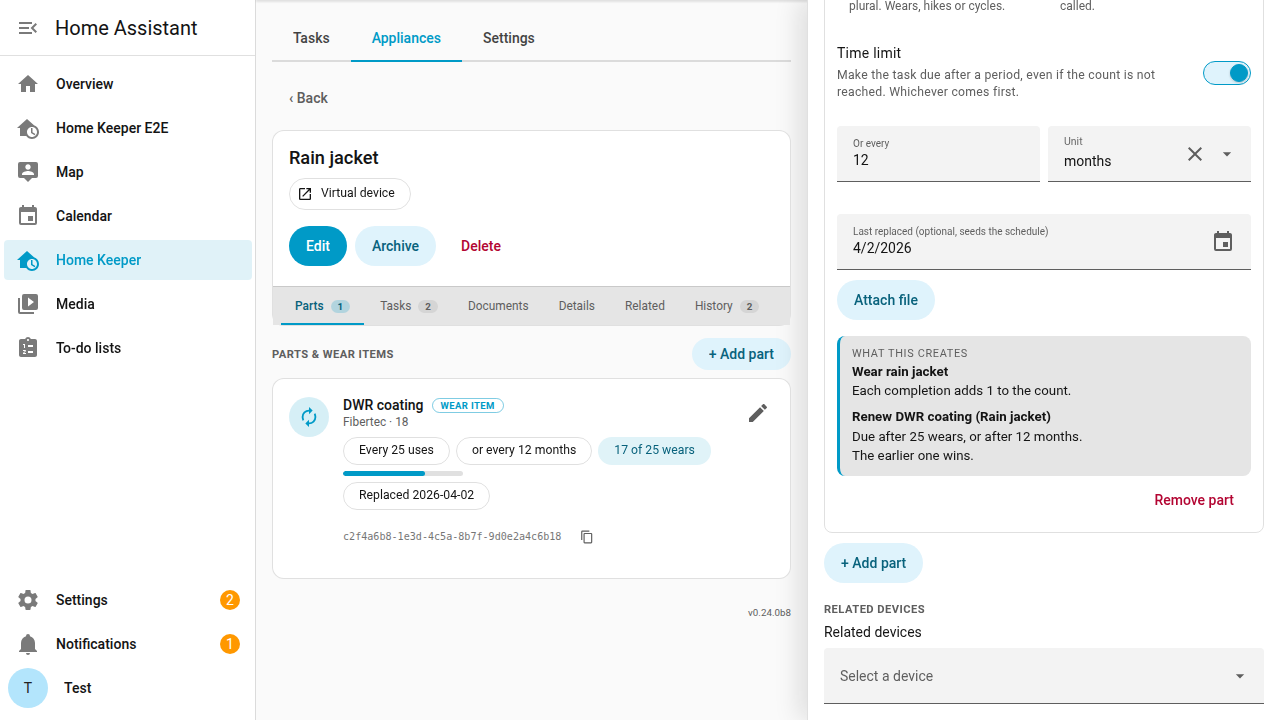
Set a wear item's unit to uses and Home Keeper counts them for you. Give the part a target of 25 uses. Home Keeper then makes 2 tasks.
- A use task that records 1 use. It has no due date and it never becomes overdue. Complete it each time you use the thing.
- A replacement task that shows no due date until the count reaches the target. It then becomes due like any other maintenance task.
Complete the replacement task to start the next count. Home Keeper stores no counter that you must reset.
A use is an ordinary completion, so anything in Home Assistant can record one:
- the Done button in the panel
- the item on your to-do list
- an NFC tag scan
- the per-task button on the appliance's device page
- a notification action
- a call to
home_keeper.complete_taskfrom an automation or a script
That last one is the useful part. An automation that watches your washing machine reach finished counts 1 wash with no counter helper and no template.
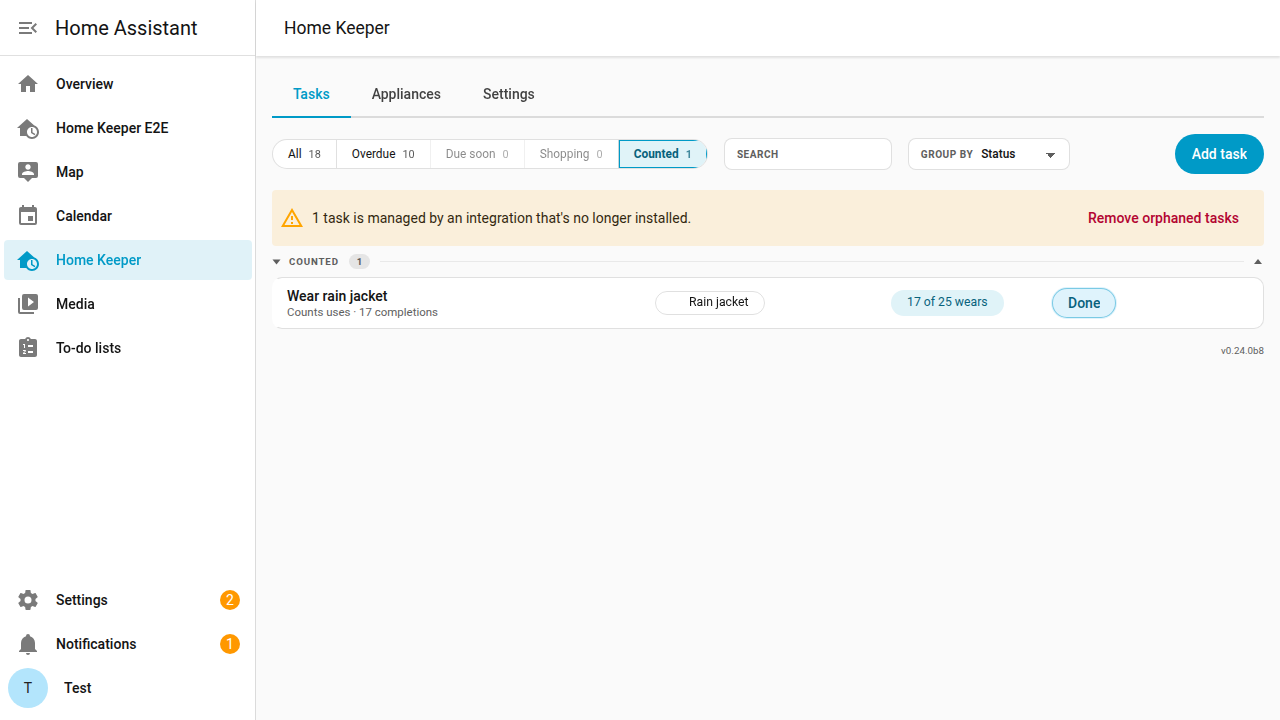
The use task has a Counted section of its own on the Tasks tab, and a scope pill beside Overdue and Shopping. Its row reads 17 of 25 wears.
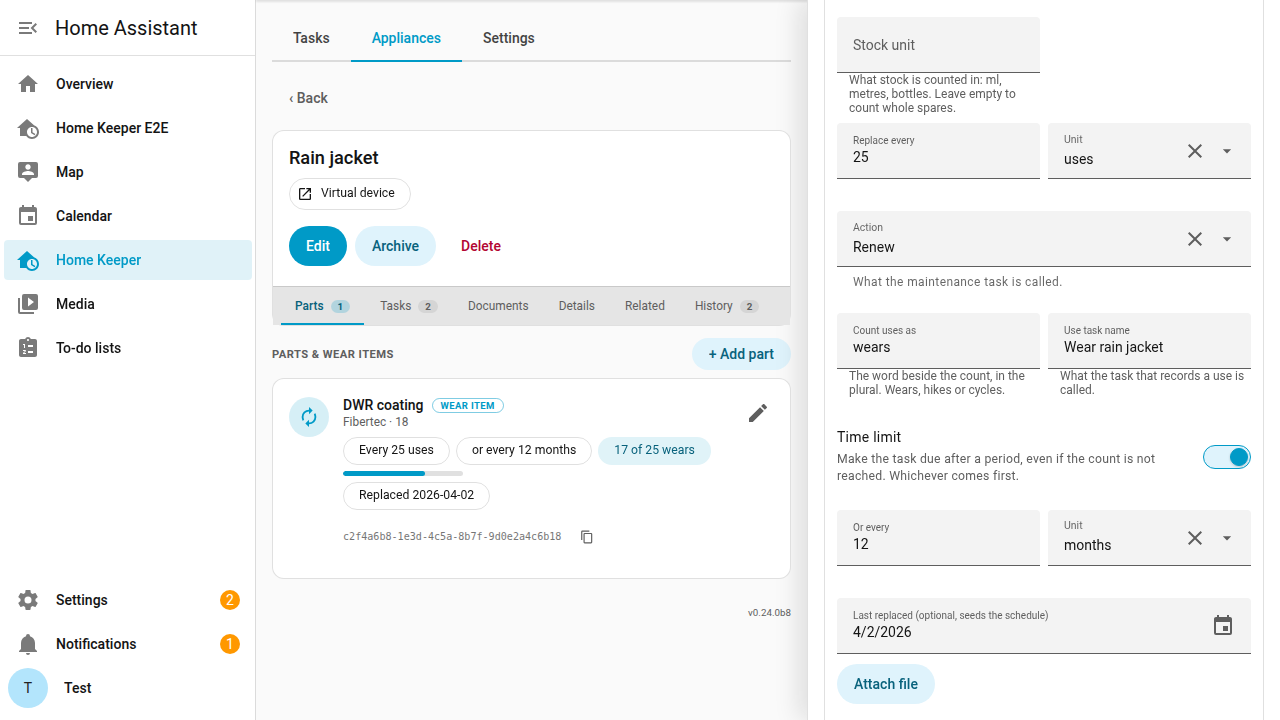
Name what you count. Set Count uses as to the plural word for your part, such
as wears or hikes or cycles. It captions the count everywhere. Set Use task
name to name the use task itself, such as "Wear rain jacket". Both are optional.
Or after a time, whichever comes first. Turn on Time limit to add a period beside the count. A coating that needs renewal every 25 wears, or every 12 months, becomes due at whichever arrives first. Completing the replacement task restarts both.
Name the job. A wear item is not always replaced. Set Action to Replace, Clean, Service, Renew, Sharpen, Rotate or Inspect, and the maintenance task takes that name. An existing wear item keeps Replace.
See what you will get. The foot of a wear item shows a box titled What this creates. It names each task and gives its schedule. A counted wear item names both of the tasks it makes. The box changes as you type, so Action and Count uses as and Use task name show their result before you save. A wear item that tracks spares also gets a line for the stock each completion takes.
A counted target is limited to 250 uses. Home Keeper keeps the completions that the count is derived from, and a larger target could lose them.
Auto-create a buy task when a part runs low
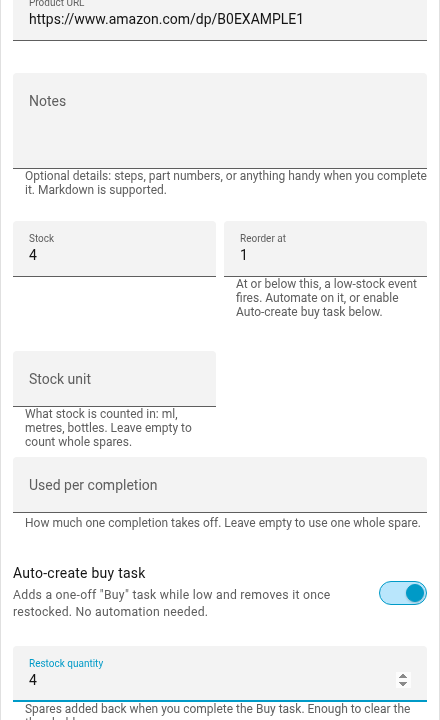
Turn on Auto-create buy task on a stock-tracked part. The option is shown when the part has a reorder-at threshold. When the stock drops to or below the threshold, Home Keeper adds a one-off "Buy {part}" task on the appliance's device and in the to-do list and in the panel. Only 1 buy task exists while the stock is low.
A completion of the buy task restocks the part by its Restock quantity. The default is 1. Set the restock quantity high enough to lift the stock above the threshold. If the stock stays at or below the threshold, the reminder remains.
A buy task has no due date, and a task with no due date is due immediately. Before
version 0.20, the buy task was shown in the Overdue section with the overdue
maintenance tasks. The buy task now has a Shopping section of its own, on the
Tasks tab and on the dashboard card. Its status reads
Low stock. The scope pills, the overdue binary_sensor of the task, and a saved
Profile all still count the buy task as overdue.
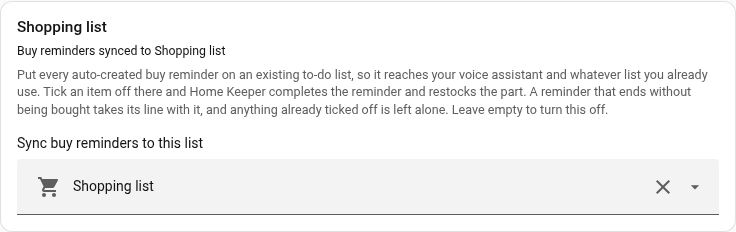
Send buy reminders to your shopping list
Select a to-do list in Settings → Shopping list. Every auto-created
"Buy {part}" task is then added to that list as an item. The Home Assistant
shopping list and a local_todo list are supported.
The line shows the amount to buy. A part that measures its stock in a unit shows the amount on the line, such as "Buy fabric softener (500 ml)". A part with a Restock quantity of more than 1 shows "Buy air filter (×2)". A part that restocks 1 whole spare is not changed. The amount is shown only on the shopping-list line. In the panel and the calendar and the notifications, the task keeps its own name.
The sync works in both directions:
- If the item is marked complete on the list, Home Keeper completes the buy task and restocks the part. The completed item remains on the list.
- If the buy task is completed in Home Keeper, the item is marked complete.
- If the part is restocked another way, the item is removed. A manual stock change and switching Auto-create buy task off both count.
Home Keeper manages the items it added and an open item with the same name that is already on the list. A completed item is not modified. Clear the setting to turn the feature off.

Offline manuals & documents
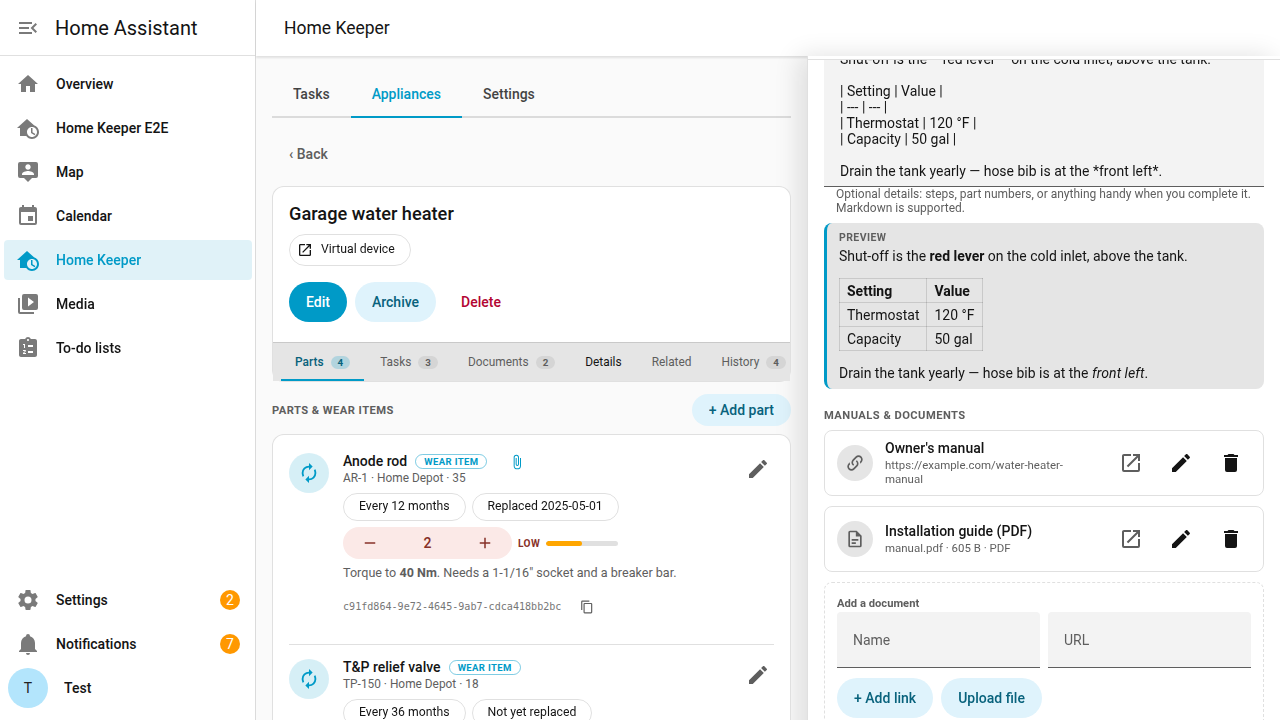
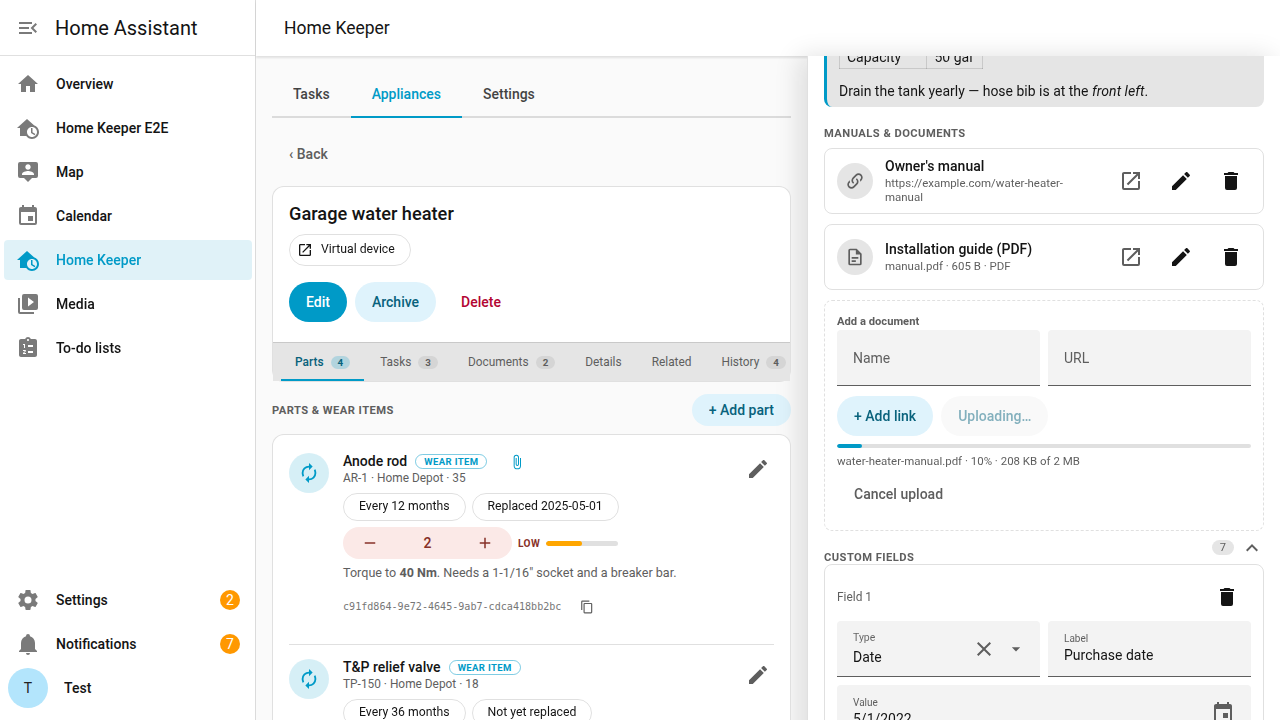
Every appliance has a list of documents, such as manuals and warranties and receipts. A document is an external link or an uploaded file. The uploaded file is a PDF or an image that is stored under the Home Assistant config directory and served through an authenticated endpoint with a short-lived signed URL. Open the appliance's Manuals & documents editor to add a link or to Upload file. A removed document and a deleted appliance delete the stored file.
Open shows the document in a new tab. Edit renames a document and changes the URL of a link. An uploaded file can be renamed only. A link can be added while the appliance is created. A file upload is available after the appliance is saved.
The services home_keeper.add_asset_document and
home_keeper.update_asset_document and home_keeper.remove_asset_document manage
link documents from an automation. File uploads are supported from the panel only.
Upload progress and failures
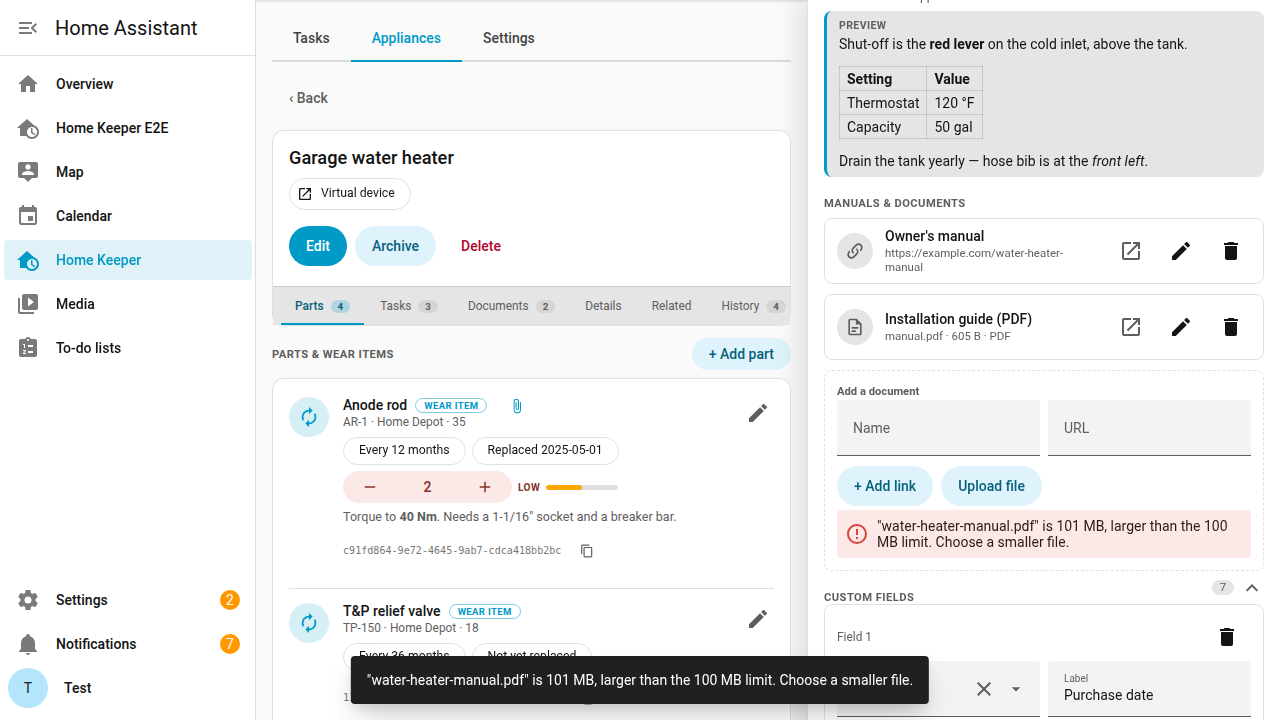
Press Cancel upload to stop an upload. Save is disabled while an upload runs. If an upload fails, the reason is shown under the Upload file button and as a Home Assistant notification.
Large uploads (413)
Home Keeper accepts uploads up to 100 MB. The panel checks the file size before the upload and rejects a larger file. Uploads are streamed to disk.
If an upload fails with HTTP 413 or is cut off before it finishes, a reverse
proxy in front of Home Assistant rejected the file. The usual cause is the proxy
request-body limit. nginx defaults client_max_body_size to 1 MB. Raise the limit
above the largest manual:
- nginx manual config: add
client_max_body_size 110M;to theserverorlocation /block, then runnginx -t && nginx -s reload.
- Nginx Proxy Manager: Proxy Host → Advanced → Custom Nginx Configuration →
add
client_max_body_size 110M;→ Save.
- "NGINX Home Assistant SSL proxy" add-on: create
/share/nginx_proxy_default.confcontainingclient_max_body_size 110M;, setcustomize.active: truein the add-on options, and restart the add-on. - Caddy:
request_body { max_size 110MB }. - Traefik: a
bufferingmiddleware withmaxRequestBodyBytes. - Nabu Casa / HA Cloud Remote UI has its own limit. Upload from the local network instead.
To confirm that the proxy is the cause, upload through the direct LAN URL
http://<ha-ip>:8123.
Relationships: subdevices & related devices
An appliance can be a subdevice of another appliance through the Home Assistant
via_device hierarchy. It is then nested under its parent on the device page. An
appliance can also list related devices from any integration. These are shown
with the appliance.
Example. Add the Garage water heater as a new appliance with its warranty expiry and an Anode rod wear item with a 12 month replacement interval. The water heater then has a device page with a warranty-expiry sensor and a "Replace Anode rod" task that is due 12 months after each completion.